Friday, August 7, 2015

Chunky Monkey Brownies!


Yummy!


Above: Ingredients used.


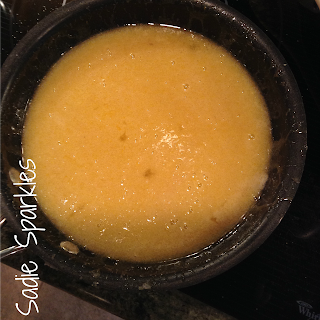
Above: Mix butter, eggs, sugar, brown sugar, salt, and vanilla. Use an electric mixer till well mixed.


Above: Mix in flour, mashed banana, and chocolate chips (chocolate melts). Use a wooden spoon.


Above: All ingredients mixed together. 


Above: Spray a 9x13 glass pan with cooking spray.


Above: Spread brownie mix in the glass pan!


Above: Pour remaining chocolate chips on top!


Above: Bake at 350* for 30-40 minutes.


Yummy yummy in my tummy!!! :)


Recipe:


Ingredients:

2 cups all-purpose flour
1 1/2 cups brown sugar
1/2 cup sugar
2 sticks (1 cup) butter; softened
2 eggs
1/4 teaspoon salt
2 teaspoons vanilla
1/2 cup mashed banana (About one banana)
12oz. semi-sweet chocolate chips
1/4 cup chocolate chips for the topping


Directions

  1. Mix butter, eggs, sugars, salt and vanilla. (Electric mixer).
  2. Add flour, mashed banana and chocolate chips.
  3. Use wooden spoon to mix together.
  4. Spray a 9x13 glass pan with cooking spray.
  5. Spread brownie mixture into prepared pan.
  6. Sprinkle chocolate chips on top.
  7. Bake at 350* for 30-40 minutes.
  8. An inserted toothpick should come out clean.
  9. Cool and enjoy!


XOXO till next time,
Sadie!

Original recipe:

Homemade Brownies!

Here is a recipe for some yummy brownies!


Above: The first thing you will do is mix together all of the dry ingredients.
EXCEPT THE SUGAR! 


Above: Melt butter in small saucepan. Once melted, mix in sugar. 


Above: Mix in eggs and vanilla. 


Above: Add the wet ingredients to the dry ingredients! And stir with a wooden soon... I didn' t use a wooden spoon, and they turned out fine :) 


Above: Bake at 350* in a 8x8 cooking sprayed pan. 


Recipe:

Ingredients:

5 tablespoons butter
1 1/4 cups sugar
1 cup flour
1/2 cup unsweetened cocoa powder
1/4 teaspoon salt
1/4 teaspoon baking powder
2 eggs
1 teaspoon vanilla
1 teaspoon water

Directions:

~Preheat oven to 350*

1} Mix dry ingredients EXCEPT SUGAR a medium/large bowl.
2} Melt butter in a saucepan. Turn off heat; mix in sugar.
3} Add eggs and vanilla to butter sugar mix.
4} Stir wet ingredients into the dry ingredients with a wooden spoon.

5}Spray cooking spray into a 8x8 pan. 
6} Cook for 20-25 minutes.
7} To test: Insert toothpick in the center, it should come out a little gooey!

XOXO till next time,
Sadie


Original recipe from:


Hi guys! I haven't posted in a while... Or a year!

Something has changed! Before, my mom was the one who had the password and access to my blog, but now I have it too! So hopefully I'll be posting A LOT more.

AND! I love to read, so I will also be doing book reviews and things like that!

XOXO till next time!
~Sadie


Thursday, July 17, 2014

It is YOURS!


When I make a card I like to make sure people know I made it! Here are my tips on making that happen. 

1-If you want to make your name known, than having family and friends use your cards instead of buying them are a great way to start!

2-Have a way for them to know (i.e. a stamp, a punch, or a tag) Mine is a below

3-Don't forget to put your "thing" on! There is not a point in doing this if you forget! (I know from experience!)


Here is my tag:

How I made mine:
Above: I used punches that I had around
Above: Glued them together
Above: I place mine on the back of the card. 
Above: To add my own touch I write 'Made with <3 by Sadie ______"


I recommend doing this! My Mom does this also!


XOXO till next time
-Sadie💋

Thursday, March 27, 2014

Baby Boy!

Hey guys!
So just recently my mom had a new baby! And it was a BOY! How exciting! Now there are two boys and three girls in our family. B-u-t if you count pets there are two boys and five girls! So those boys will be out numbered forever in less we get a boy pet😜 I feel my brother is still very young so I feel that maybe it wouldn't be a good idea to post pictures or his name just quite yet. But maybe in the future I will post pictures! If you have any questions about him (please don't make them too personal) just comment and I'll try to get back to you!

XOXO till next time,
        Sadie💋

Wednesday, March 26, 2014

Cookies for Uncle Sock!

So... I haven't blogged in a V-E-R-Y lone time. I have just been busy with, well.... Life. So today I'm gonna share about "cookies for uncle Sock!" 

When I was very little I couldn't say "Uncle Scott" so I called my uncle "Uncle Sock"! Hence the title "Cookies for Uncle Sock!" This year for Christmas we got him a present and a treat from ME when he wants it! Tomorrow we are having a Frozen party at his house so I made cookies! I think you should try them too! 

Above: the dough for these cookies. It doesn't stick together like regular cookie dough, but it still works just fine😉

Above: I took the 1/3 cup and patted the dough in get the shape I needed!
Above: these are the cookies while baking in the oven.
Above: cookies just out of the oven! 

My ultimate taste tester is my step dad Joe, he said that they were good, but the name was false they weren't very chewy. (At all) But that's OKAY! 

Thank you for reading, down below I will leave the address for the COOKIES!!!

XOXO till next time,
             Sadie💋


http://thefrugalgirls.com/2009/04/chewy-jumbo-chocolate-chip-cookies.html

Tuesday, August 6, 2013

Pistachio Torte

Hi everyone!!! Sorry I haven't blogged in like what, forever??? Well I've got a couple to do in the next few days!!! (or if your lucky I might do both today-haha)

Well my first post will be about... wait for it...              Pistachio Torte!!!!!!  It was delicious!!!
If you would like to try this torte here is were you can: http://www.whimsy-love.com/2008/04/pistachio-torte-recipe.html    (You should totally try it!!!)

 up above: that was the bottom layer (the crust) after I baked it. (it doesn't look much different before you put it in the oven) In the crust there was flour,butter, and walnuts. In  the recipe it just says "butter" but it needs to be very soft if not melted. I didn't soften the butter enough so i had to put the whole bowl with the flour, butter, and walnuts all in the microwave. You don't want to have to do that, trust me!!!
 up above: this was the second layer. In this layer I had to beat together cream cheese, powdered sugar, and 1/2 carton of cool whip. Once the crust was cooled I had to pour this mixture on top of it!!!
 up above: the green layer is milk and the pudding powder. I poured it over the cream cheese mixture and then spread the other half of the cool whip on the pudding mixture. Then I put it in the refrigerator to cool.
up above: finished with the cool whip all spread out on top!!!
                                              up above: the first slice of torte that we cut!!!

Thanks for reading!!! I've got another post to make! Hope You'll come back and read it!!!
                                                            See you later- Sadie